If you have access to the OpenAI Chat Completions GPT APIs either through the one from OpenAI LLC or Azure OpenAI, it is pretty simple to create the ChatGPT-like app using Power Apps and Power Automate. The intention of this article is to create a simple application process without worrying too much about making it pretty or efficient.
What you need is just access to GPT APIs. For OpenAI, you just sign up for API access even if you are not on the ChatGPT Plus plan. For Azure OpenAPI, you must have a subscription with the access request to its GPT API. Note that it does not matter if you want to work on GPT 3.5 or 4. They have the same structure. We will use the Chat Completions API because we would like to create a chatbot application. The same methodology can be used for other applications, such as image generation API with the DALL-E model, if you want to create an app to generate images with text inputs.
Let’s get started it!
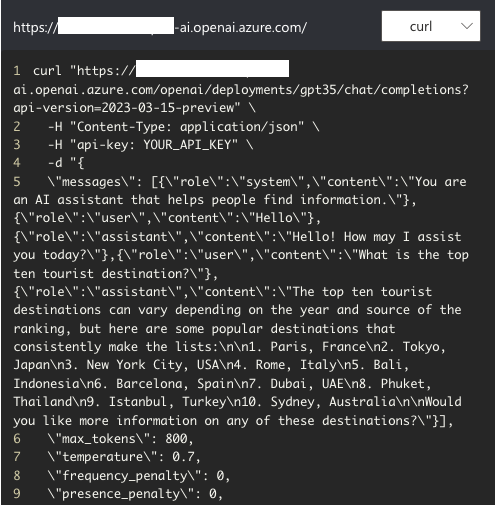
To understand what payload information to send via API, you can review the following chat from the provided Playground.
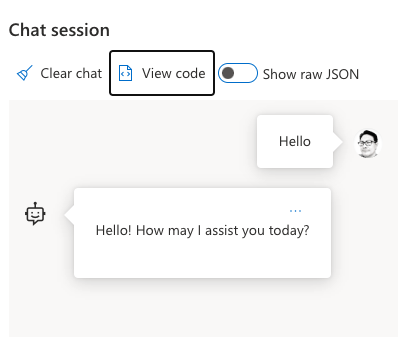
The View Code shows typical API calls (in this case, using curl) with header information (-H) and data (-d). What we’re interested in is that content in the -d. In particular,
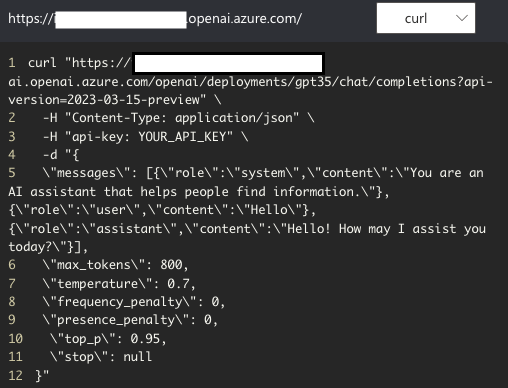
{\"role\":\"system\",\"content\":\"You are an AI assistant that helps people find information.\" | This is the system prompt JSON input where you can influence how the GPT responds. The technique here is called Prompt Engineering. This is a very interesting subject that will require its own posts. It is not in the scope of this article. |
{\"role\":\"user\",\"content\":\"Hello\"} | This is the user prompt JSON input. |
{\"role\":\"assistant\",\"content\":\"Hello! How may I assist you today?\"} | This is the chat JSON output. |
If I would follow up with another question and get another response.
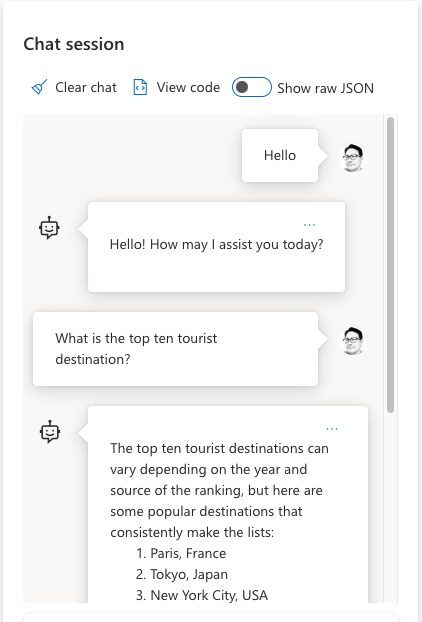
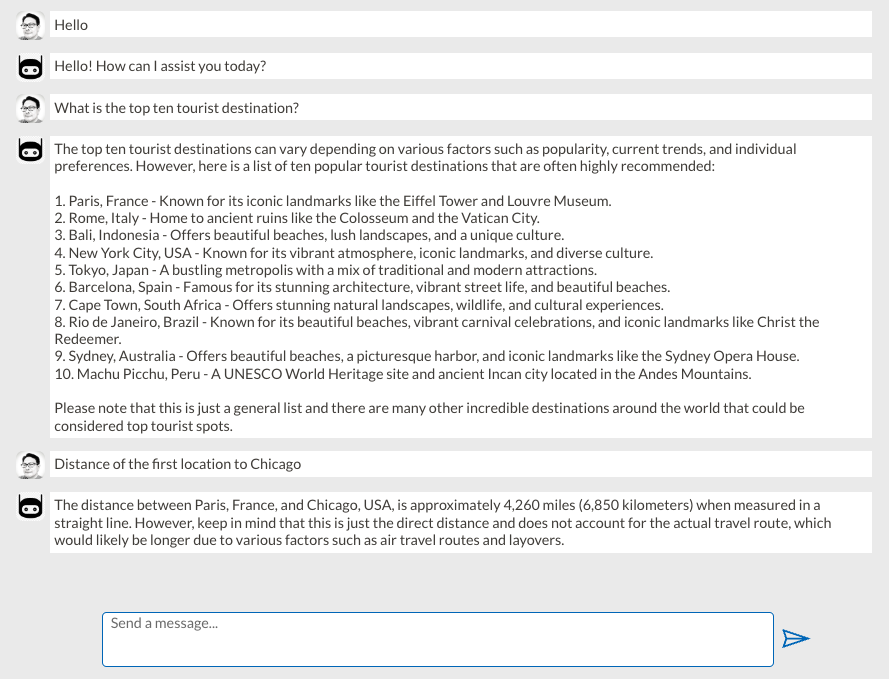
This subsequent conversation shows what we expect with alternating between user and assistant prompts, but still only one system input prompt. Note that we also still send the previous conversation so the chat has context in case subsequent questions are being asked in relation to previous questions and answers. For example, if we would ask the “Distance of the first location to Chicago,” it will know that we’re talking about “Paris, France,” which is the first location in the previous answer.
{\"role\":\"system\",\"content\":\"You are an AI assistant that helps people find information.\" | This is the same system prompt input without any additional text. |
{\"role\":\"user\",\"content\":\"Hello\"} | This is the first user prompt JSON input. |
{\"role\":\"assistant\",\"content\":\"Hello! How may I assist you today?\"} | This is the first chat JSON output. |
{\"role\":\"user\",\"content\":\"What is the top ten tourist destination?\"} | This is the second user prompt JSON input. |
{\"role\":\"assistant\",\"content\":\"The top ten tourist destinations can vary depending on the year and source of the ranking, but here are some popular destinations that consistently make the lists:\n\n1. Paris, France\n2. Tokyo, Japan\n3. New York City, USA\n4. Rome, Italy\n5. Bali, Indonesia\n6. Barcelona, Spain\n7. Dubai, UAE\n8. Phuket, Thailand\n9. Istanbul, Turkey\n10. Sydney, Australia\n\nWould you like more information on any of these destinations?\"} | This is the second chat JSON output. |
Now we have all the basic structure of the payload. Let’s start building the app.
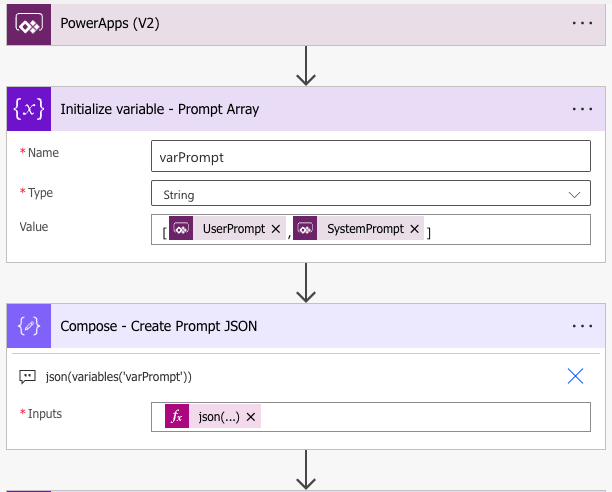
I started with Power Automate flow with Power Apps (V2) triggering event with two String inputs – one for user prompt, the other for system prompt. I will use only the former for now. The latter is just a placeholder in case I plan to use the system prompt in the future.
The endpoint URL is just what the document provides, which has minor variations (OpenAI and Azure OpenAPI.) The rest of the information is all from the documentation.
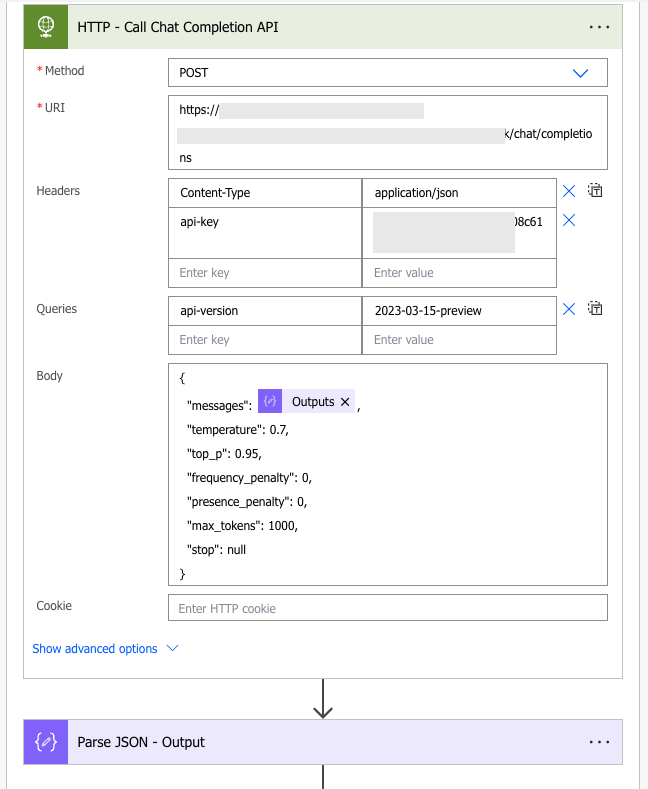
Finally, we will just extract only the message/content of the first output under choices.

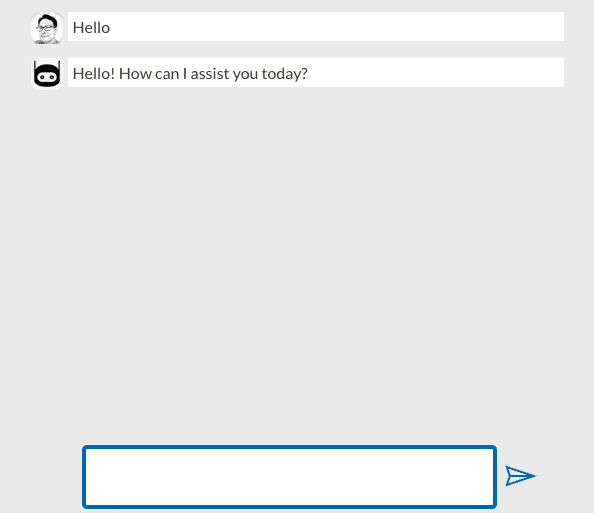
A simple chat user interface on Power Apps can be created by using a Flexible Height Gallery with Image and Label components.
I use a Collection named colChatConversation to store the profile, which is either “Me” or “Bot” in the who column and chat content in the chat column.
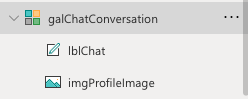
| Gallery: galChaConversation | Collection: colChatConversation |
| Image: imgProfileImage | If(ThisItem.who = “Me”, User().Image, bot) |
| Label: lblChat | ThisItem.chat |
The code of the button’s OnSelect to submit the user message is the following:
// Check the content of the User Message
If(Not(IsBlank(txtPromptUser)),
// Only perform all tasks below when the content is NOT empty.
// Add into collection the User Message (Me)
Collect(colChatConversation, {
    who: "Me",
    chat: txtPromptUser.Text
});

// Construct/Append JSON of the User Prompt, where role = user
If(gloPromptUser = "",
  // First time
  Set(gloPromptUser, "{""role"": ""user"",""content"":""" & txtPromptUser.Text & """}"),
  // Subsequent - append with "," in the front
  Set(gloPromptUser, gloPromptUser & ",{""role"": ""user"",""content"":""" & txtPromptUser.Text & """}")
);

// Optionally, construct JSON of the System Prompt, where role = system. In this sample, it will be just blank.
Set(gloPromptSystem, "{""role"": ""system"",""content"":""" & gloSystemPromptText & """}");

// Call Power Automate flow
Set(gloOutputResponse, 'RunOpenAIChatComplete'.Run(gloPromptUser, gloPromptSystem));

// Add into collection the Bot Response (Bot)
Collect(colChatConversation, {
    who: "Bot",
    chat: gloOutputResponse.responseoutput
});

// Append JSON of the Bot Response Prompt, where role = assistant
Set(gloPromptUser, gloPromptUser & ",{""role"": ""assistant"",""content"":""" & gloOutputResponse.responseoutput & """}");

Reset(txtPromptUser);
// End If(Not(IsBlank(txtPromptUser))
,
// Else when message is empty
Notify("Please enter a message.", NotificationType.Warning, 1000);
)